NGINX Open Source and NGINX Plus instances are used as an all-in-one load balancer and API gateway widely used by DevOps teams across organizations.
However, as the organization and its load balancing functions grow, it gets difficult to manage all instances, their configurations and security updates. This is where NGINX Instance Manager comes in.
NGINX Instance Manager: Overview
NGINX Open Source and NGINX Plus are powerful web servers designed for accelerating a company’s IT infrastructure. The wide-ranging applicability of this reverse proxy cum load balancer and API gateway can lead towards NGINX instances spread across an organisation.
The best way to track such instances and ensure their settings and configurations is by deploying the NGINX Instance Manager. In addition, NGINX Instance Manager can help boost DevOps productivity with RESTful APIs.
This APIs help in automating all tasks related to NGINX Plus and NGINX Open Source monitoring and configuration. Instance tracking and monitoring tasks can be integrated into CD/CI workflows to boost the overall productivity of your DevOps team.
Enlisted here are the ways NGINX Instance Manager makes configuration and asset management easy for you.
Functionalities of NGINX Instance Manager

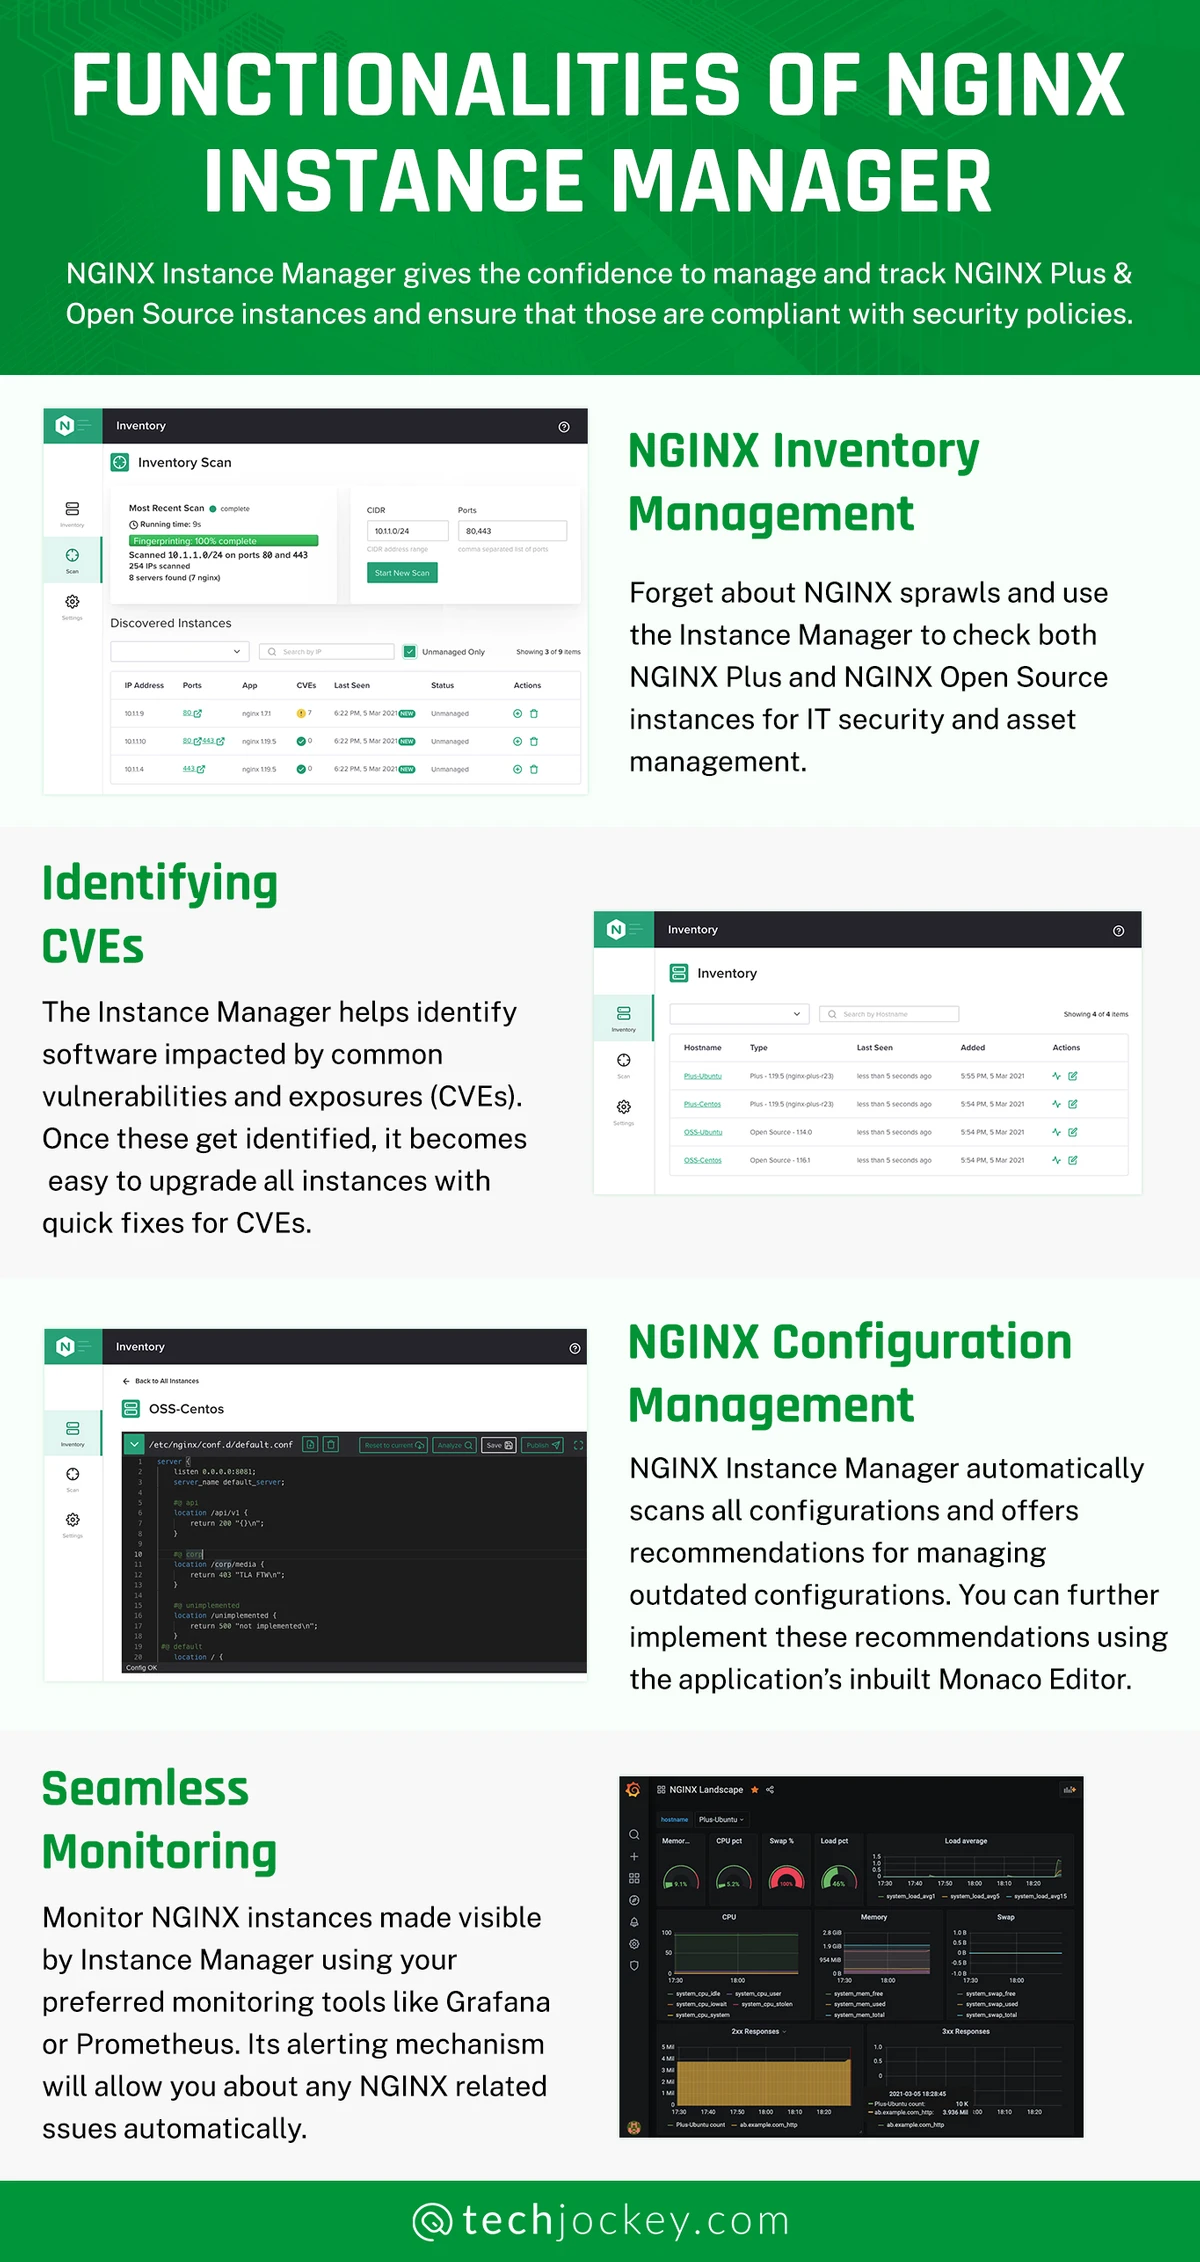
NGINX Instance Manager gives the confidence to manage and track NGINX Plus and Open Source instances and ensure that those are compliant with security policies.
- NGINX Inventory Management
Forget about NGINX sprawls and use the Instance Manager to check both NGINX Plus and NGINX Open Source instances for IT security and asset management.
- Identifying CVEs
The Instance Manager helps identify software impacted by common vulnerabilities and exposures (CVEs). Once these get identified, it becomes easy to upgrade all instances with quick fixes for CVEs.
- NGINX Configuration Management
NGINX Instance Manager automatically scans all configurations and offers recommendations for managing outdated configurations. You can further implement these recommendations using the application’s inbuilt Monaco Editor.
- Seamless monitoring
Monitor NGINX instances made visible by Instance Manager using your preferred monitoring tools like Grafana or Prometheus. Its alerting mechanism will allow you about any NGINX related issues automatically.
Try Now: Hyperconverged Infrastructure Solution | Load Balancing Software | Load Testing Software
How To Install and Configure NGINX Instance Manager?
Let us have a look at the key steps to installing NGINX Instance Manager.
Essential Pre-requisites
- Requirement 1 – For production usage, start by downloading the server license file for the Instance Manager.
- Requirement 2 – For repo access, download the repository certificate and its key.
- Requirement 3 – Host the NGINX Instance Manager Server by developing Linux Instance.
How to Install NGINX Server Packages?
Choose any of the following two:
- Utilize the available public NGINX repositories with certificate & keys. Alternatively, you may pick internal package management systems.
- Download the package to start using it instantly from the myF5 portal.
NGINX License Files
The following are the license file locations within NGINX Instance Manager.
- License File Type 1 – NGINX-Instance-Manager.lic
This file only displays the scans and no inventory page details.
- License File Type 2 – nginx-repo.crt or nginx-repo.cer
This file type is used for running the proxy of NGINX Plus and pulling packages from public repositories.
- License File Type 3 – nginx-repo.key
This file type runs with the cry for both NGINX agent and NGINX manager.
NGINX Installations from Multiple Sources
As you complete the above requirements, it is now possible to download NGINX from different sources with the steps below.
Source 1 – NGINX Public Repositories
- Step 1: Create etc/ssl/nginx directory
- Step 2: Log in at MyF5 Customer Portal to start downloading nginx-manager-repo.crt & nginx-manager-repo.key
- Step 3: Copy files to location etc/ssl/nginx/ directory
- Step 4: Install the necessary certificate authority dependencies
- Step 5: Install the repository files
- Step 6: Start installing the server now
Source 2 – Installation from Package Files
Download the packages provided by the Instance Manager’s sales team or use the MyF5 portal to get one. As you complete the installation process using any of the two sources above, it is now time to configure NGINX with or without a proxy server. Configure it, and the app is ready to use.
Somya is one of the most experienced technical writers in the team who seems to be comfortable with all types of business technologies. She is a sensitive writer who ensures that businesses are able to find the right technologies through her writings. She would leave no stones unturned... Read more


