Summary: With Jupyter Notebook, you can write codes, edit notebook cells, or even restart the entire program in a single notebook. Let’s learn how you can perform these functions in detail in the tutorial below.
Jupyter Notebook allows you to create and share documents that contain live code, equations, visualizations, and narrative text. Whether you’re a programmer, data scientist, or researcher, this versatile platform supports multiple programming languages like Python, R, and Julia for data cleaning and analysis.
In this guide, we will learn more about Jupyter Notebook, right from installing to executing code cells, creating visualizations, etc.
What is Jupyter Notebook?
Jupyter Notebook is a type of web application used for generating and sharing computational documents for data analysis. It can be used for data cleaning, numerical simulation, data visualization, statistical modeling, etc.
Instead of writing and rewriting the entire document, you can write code in individual cells and run the document code individually. In case you want to make changes to the document, you can go back to it, make changes, and rerun the document, all from the same window.
How to Install Jupyter Notebook?
The easier way to use Jupyter Notebook is by installing Anaconda that comes preloaded with Python libraries and tools including NumPy, pandas, Matplotlib, etc. To get started with Anaconda, you need to download the latest version.
If you have python installed already and want to manage all the packages manually, you can use pip: pip3 install jupyter.
How to Use a Notebook in Jupyter?
In this section, we will be learning about how to run, save, and share your notebooks. Moreover, you will also learn about how to use its components like cells and kernel, along with how to read and write files in Jupyter. Let’s get started with the guide on how to use a Notebook in Jupyter.
1. How to Run Jupyter Notebook?
For launching a Jupyter Notebook, you need to open the terminal and navigate to the directory where you will save the notebook. Next, type command jupyter notebook and the program will instantiate a local server at localhost:8888 (or another specified port).
The browser window will pop up with the Notebook interface or you can use the address it provides to you. These notebooks have a unique token because Jupyter uses pre-built Docker containers for putting notebooks on their unique path. For stopping the kernel from the terminal, press control-C twice.
2. Creating a Notebook
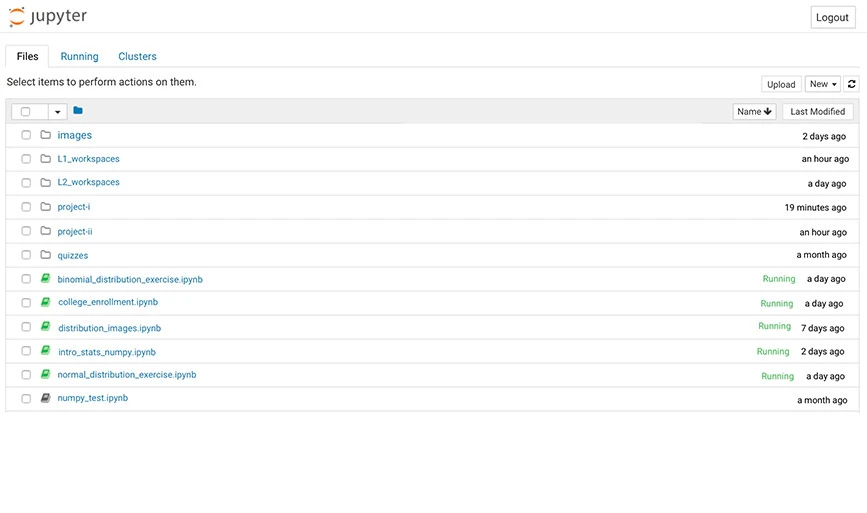
To create a new notebook, go to New and Select Notebook in Python 3. In case you already have Jupyter Notebook, you can click on Upload and go to that file.
3. Using Cells in Jupyter
In Jupyter, there are three types of Cells including Code, Markup, and Raw NBConverter.
- Code Cell: It contains codes that will be executed in the Kernel. When the code runs, the notebook will display the output of the code cell.
For example, in the below image, Fibonacci series is generated with a simple code along with inputs provided by users.
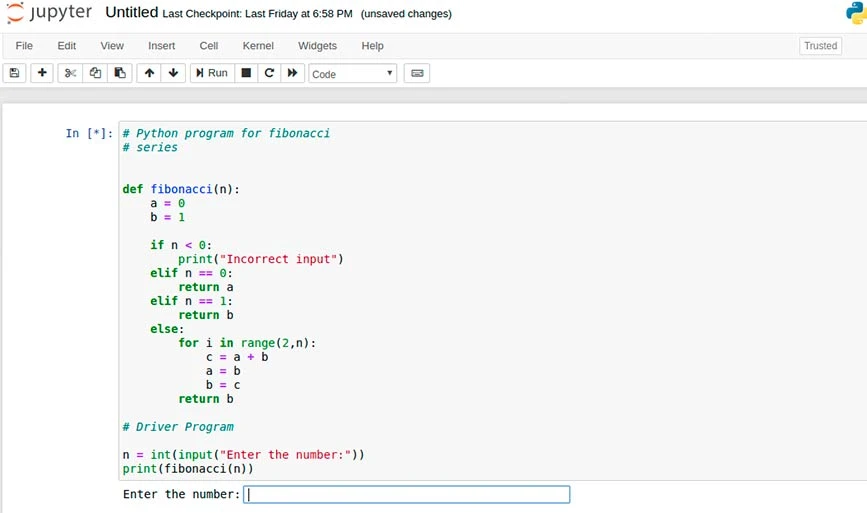
The output of this command is shown below:
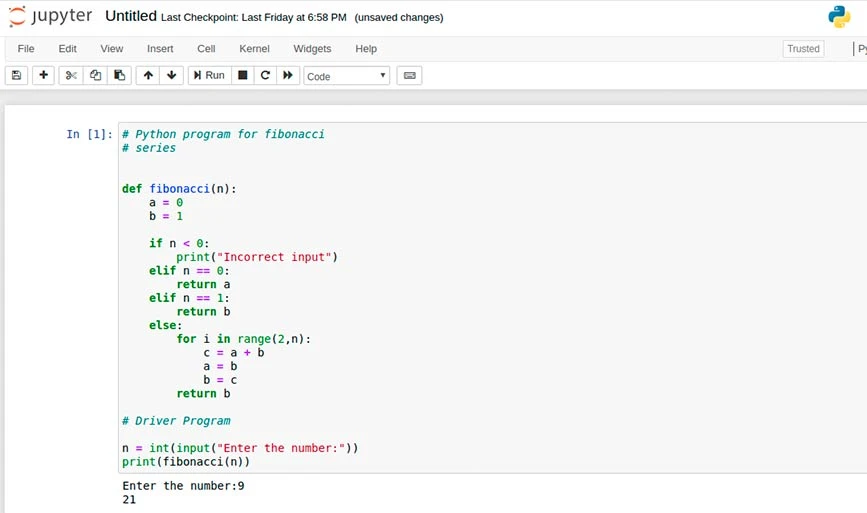
- Markup Cell: This cell contains the text formatted via Markdown and shows the output in-place while Markdown cell is running. For example, for adding headers, you need to prefix any line by single or multiple ‘#’ followed by space as shown in the image:

Output:

- Raw NBConverter: With this, you can write the output directly and the cells are not evaluated by notebook. Once they are passed via NBConverter, they are added to the destination folder without any changes.
4. Using Kernal in Jupyter
The Kernel is a type of computational engine that executes the code present in the notebook document. The kernel exists for a document as a whole rather than for individual cells. For instance, if a mode is added in a single cell, then this module will be available for the entire document.
You will get multiple options to use the kernels like restarting the kernel, changing and clearing the output, and interrupting the kernel.
5. How to Write a Jupyter Notebook
To read and write files in Jupyter Notebook, click ‘Browse and upload files” of the left-hand menu to open the file system. Next press ‘plus’ to upload file from the local folder. For example, when you will upload a simple text file called hello_world.txt., in Jupyter, it will look like this:
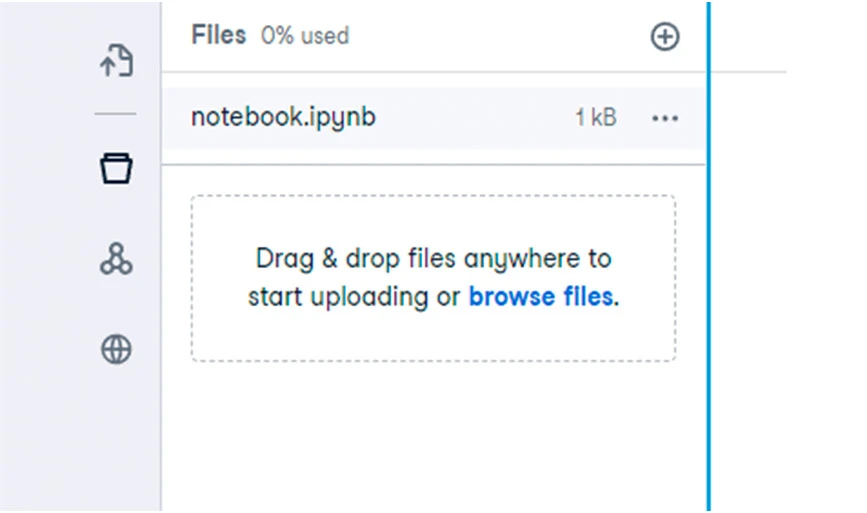
You can use this code to open this file, add some text, and save a new file.
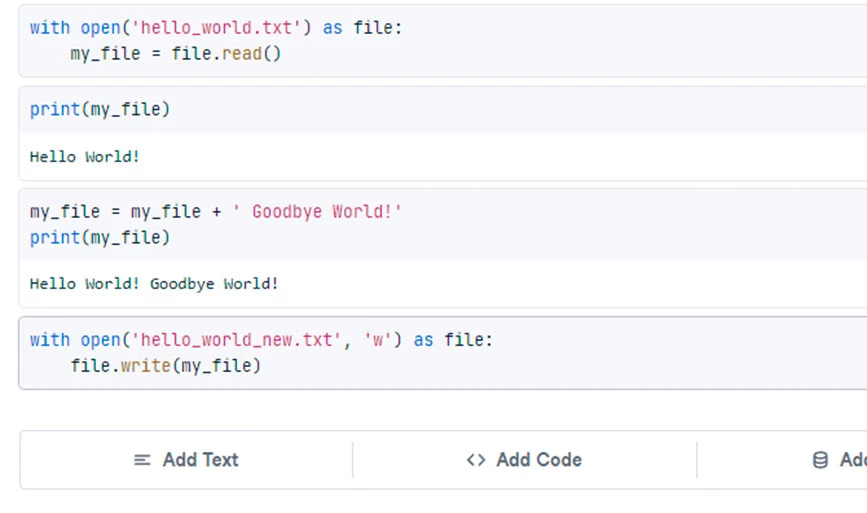
After that, your file will look like this with all the updates.
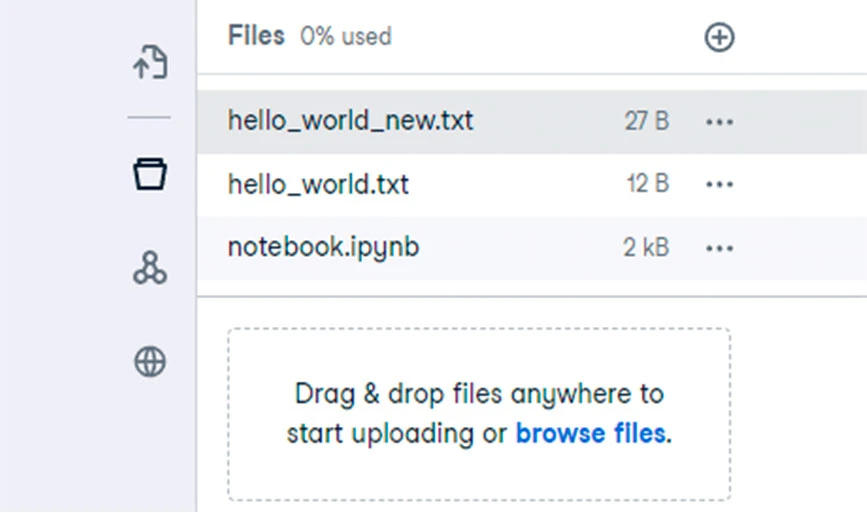
6. How to Use Command Mode and Edit Mode in Jupyter
Jupyter Notebook offers two interaction modes: command mode and edit mode. Within the command mode, you can navigate within cells, add or remove cells, or even change the cell type. With the edit mode, you will be able to modify the cell content.
To enter the command mode, press Escape or click outside the cell. To enter edit mode, press Enter or click inside a cell. In Workspace, click on the ‘Add Text’ or ‘Add Code’ buttons for adding a new cell as shown below:

7. Publishing Reports (Available for Workspace only)
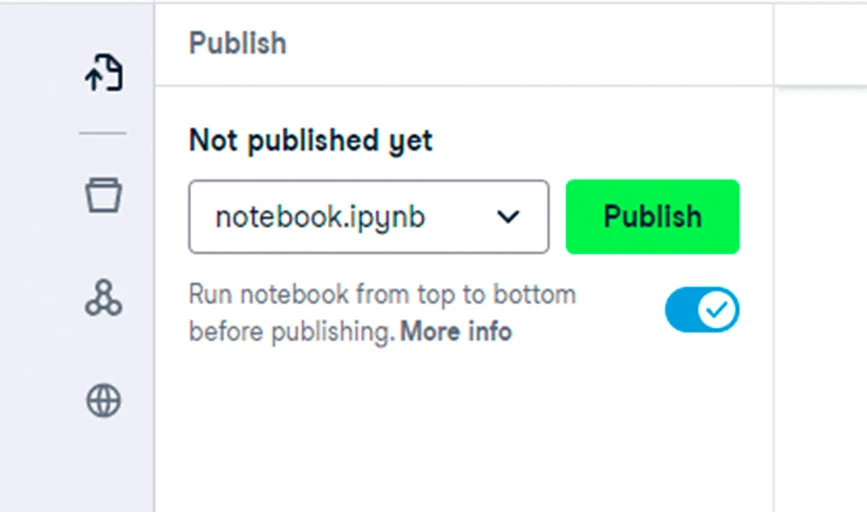
In the workspace, you can publish your notebook via ‘Publish’ button available on the side menu. You can also check your notebook from top to bottom, before publishing to ensure the code is right. Once it is published, other users can also view the notebook and add comments in the individual cells.
8. Sharing Jupiter Notebooks (Available for Workspace only)
The option to share your notebooks is only available with Workspace. For that purpose, select the share button on the top right. When you select it, you can copy the link to share it. Moreover, you can create private and public access to the file as shown below.

9. Naming the Notebook
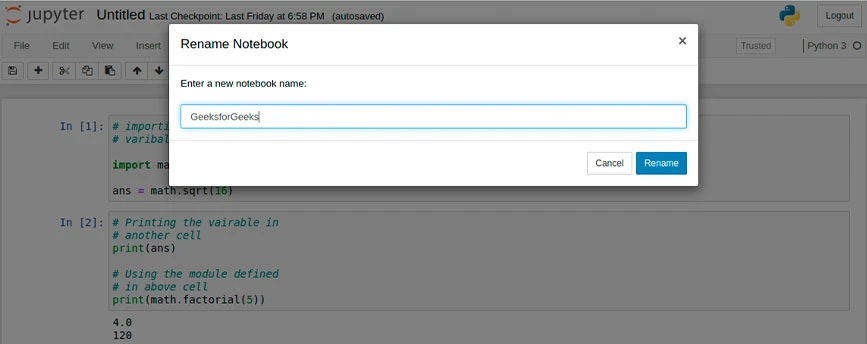
The created notebook is named as Untitled by default in Jupyter Notebook. For renaming the file, open the word Untitled. This will open a dialogue box named Rename Notebook where you need to add a name and then click ok.
10. Notebook Extensions
Jupyter offers four types of extensions including Kernel, IPyhton Kernel, Notebook, and Notebook server. Many extensions can be installed via Python’s pip tool. Other extensions can be installed by using the given command.
jupyter nbextension install extension_nameThis command will only install the extension. However, to enable it, you need to type the following command.
Most Common Keyboard Shortcuts Available in Jupyter Notebook
There are multiple types of Keyboard shortcuts available in Jupyter through which you can use different commands. Here is the list of some of the most common Keyboard shortcuts in Jupyter:
- Toggle between edit and command mode with
EscandEnter, respectively. - Once you are in command mode:
- Scroll up and down your cells with your
UpandDownkeys. - Press A or B to add a new cell above and below the active cell.
- M will transform the active cell into a Markdown cell.
- Y will transform the active cell to a code cell.
- D + D (D twice) will remove the active cell.
- Z will undo cell deletion.
- Hold
Shiftand pressUp or Downto select cells simultaneously. With multiple cells selected,Shift + Mwill club your selection. Ctrl + Shift + -, in edit mode, will split the active cell at the cursor.- You can also click and
Shift + Clickin the margin to the left of your cells to select them.
Conclusion: In this article, you might have got familiar with a lot of things that you can do in Jupyter Notebook including its creation and code modifications. We have covered most of the functions that you can do with Jupyter Notebook in the above article. If you want to learn more about their functions in detail, you can visit their documentation page and search for the functions you want to learn more about.
FAQs Related to Jupyter Notebook
Can I run a Jupyter Notebook from command line?
Yes, you can run Jupyter Notebook from command line in the terminal.
How do I run a Jupyter Notebook in Anaconda?
To run a Jupyter Notebook in Anaconda, you need to open Anaconda Navigator via the Windows start menu and choose [Anaconda3(64-bit)] –> [Anaconda Navigator] to create notebooks.
How to add image in Jupyter Notebook?
You can add images in Jupyter Notebook directly via edit menu, or by using a python code. Moreover, you can add it by embedding it in a markdown cell.
How to add text in Jupyter Notebook?
You can use its Text Box for adding text in Notebooks.
How to add titles in Jupyter Notebook?
Utilize the number sign (#) followed by a blank space for notebook titles and section headings: # for titles. ## for major headings. ### for subheadings.
Varsha is an experienced content writer at Techjockey. She has been writing since 2021 and has covered several industries in her writing like fashion, technology, automobile, interior design, etc. Over the span of 1 year, she has written 100+ blogs focusing on security, finance, accounts, inventory, human resources,... Read more


